

Key Takeaways
Why loading order matters more than packing light
Most families approach road trip packing as a space problem: fit everything in. The real problem is weight distribution and access. A car loaded without a plan handles differently, burns more fuel, and turns every rest stop into a 15-minute search mission. Before you start, check that your vehicle is mechanically ready. See the pre-drive maintenance checklist for a full rundown on fluid levels, brakes, and tires.
The steps below assume a standard SUV or minivan, but the principles apply to any vehicle with a rear cargo area. Sedans with trunk space follow the same priority tiers, just with less room to work with.
What you will need
Tools and gear that make organized loading easier
You do not need specialized equipment, but a few inexpensive items make a real difference in how well your load stays organized over a multi-day trip.
Cargo net or luggage retainer strap
Prevents bags from shifting or tumbling forward during braking.
Seat-back organizer
Keeps tier-one items within reach for rear passengers without cluttering the seat.
Collapsible soft cooler
Holds drinks and snacks and can be flattened on the return trip to reclaim space.
Roof cargo carrier or box
Adds volume for lightweight bulky items when interior space is fully used.
Tire pressure gauge
Confirms correct pressure after loading, before departure.
Packing cubes
Compresses clothing and keeps each person's items contained inside a shared bag.
Step-by-step loading sequence
Look up your vehicle's payload capacity
Before anything goes in the car, find the maximum payload your vehicle can carry. This figure is usually printed on a sticker inside the driver's door jamb and appears in the owner's manual under specifications. Payload includes passengers and cargo combined. Exceeding it strains the suspension, increases stopping distances, and can void warranty coverage on related components.
Sort your gear into three priority tiers
Separate everything into three groups before a single bag touches the car. Tier one is items you will need during the drive: snacks, water, medications, chargers, and entertainment for kids. Tier two is items needed at the first stop or overnight: a change of clothes, toiletries, and your roadside emergency kit. Tier three is everything else for the full trip. This sorting step controls what goes where and prevents digging through luggage on the highway.
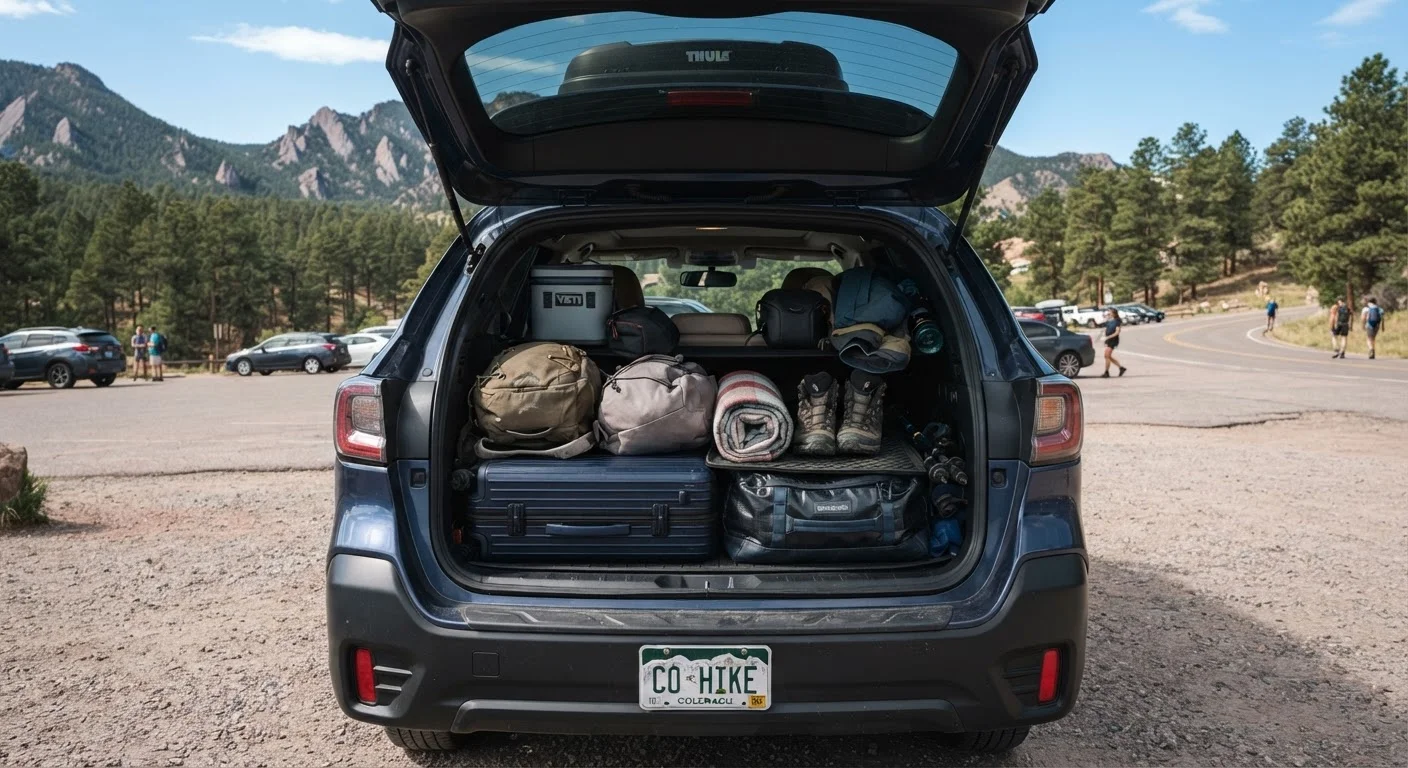
Load heavy items first, low and centered
Place the heaviest bags and equipment directly on the cargo floor, pushed as far forward as the space allows and centered side to side. Coolers, large duffel bags, and tool kits belong here. Keeping mass low reduces the risk of the vehicle rolling during sudden turns. Centering weight prevents one side of the vehicle from sitting noticeably lower, which affects tire wear and handling.
Fill gaps with soft bags and clothing
Soft-sided bags, rolled clothing, and pillows fill irregular gaps around rigid items and help prevent cargo from shifting while driving. Pack them snugly against the heavier bags loaded in the previous step. This also makes the load more stable without adding restraint straps, though cargo nets or straps are worth using if your vehicle has anchor points.
Put tier-one and tier-two items within reach
Your tier-one bag belongs on the rear seat floor or in a seat-back organizer, not in the trunk. Tier-two items go on top of the cargo stack so they can be pulled out at a gas station or motel without disturbing the rest. A small, soft bag with the roadside emergency kit should stay accessible, ideally under the rear cargo floor cover or in a side pocket.
Minimize what goes on the roof
A roof carrier or cargo box adds usable space but raises the vehicle's center of gravity and increases aerodynamic drag. Use roof space only for bulky, lightweight items such as sleeping bags, foam pads, or athletic gear. Follow the roof rack's rated weight limit, which is separate from the vehicle's payload capacity, and secure everything with rated straps rather than bungee cords. Check that all latches and locks are engaged before pulling out of the driveway.
Do a final walk-around and check tire pressure
With the car fully loaded, walk around and verify nothing is hanging over the sides or rear. Check that all doors, the hatch, and any roof carrier are fully closed. Then check tire pressure with the vehicle at its loaded weight, because a loaded vehicle needs tires at or near the maximum recommended pressure shown on the door sticker, not the tire sidewall. The tire condition guide covers what to watch for before a long drive.
Safety and comfort once you are on the road
A well-packed car still needs a few in-cabin habits to keep the drive safe. Every passenger should be properly buckled, including any lap belts for middle-seat riders. Items on the rear seat should not obstruct the driver's sightlines in the rearview mirror. If cargo blocks the view entirely, rely on side mirrors and slow down more than usual in reversing situations.
For long stretches, rotate snack and activity bags so kids are not rooting around the cargo area while the car is moving. If you are carrying a roadside emergency kit, confirm its location with every adult in the vehicle before departure so anyone can retrieve it quickly if needed.
Fuel costs will run higher than usual with a fully loaded vehicle and any roof cargo. That is worth factoring into your trip budget. The road trip budgeting guide has a realistic breakdown of where costs accumulate on family drives.